Tuesday, October 11, 2011

Transfer Contacts From Gmail To Outlook 2010


Today a client came to me complaining her blackberry contacts were not synching with her Outlook. upon checking the contacts in her blackberry I noticed she had been saving all her contacts in her Gmail personal account. I had to transfer all her contacts from Gmail to her Outlook, so the contacts would sync with her blackberry through our BES server . luckily the process of exporting contacts from Gmail, and importing them to Outlook is quite easy.
here is how.
login to your Gmail account, and click on Contacts. then click on More actions, and then select Export:
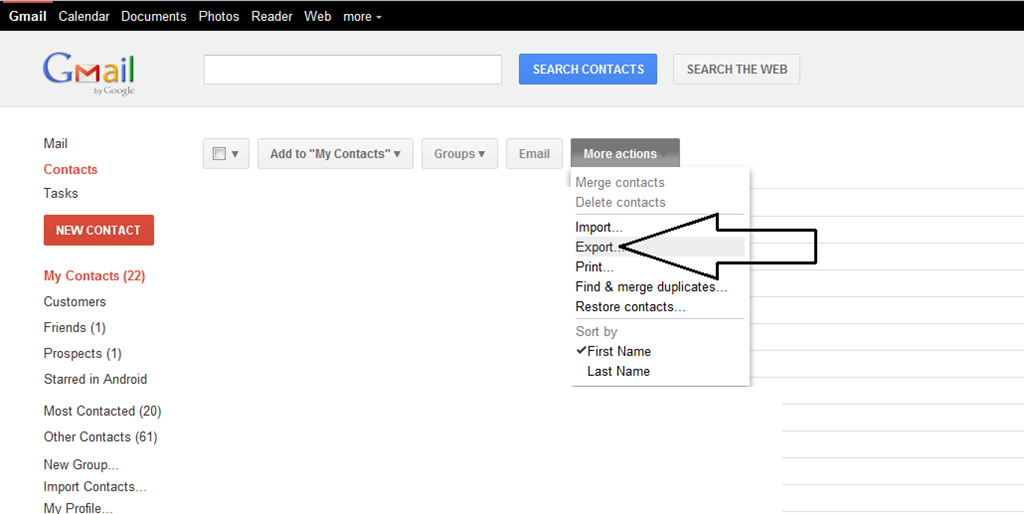
image
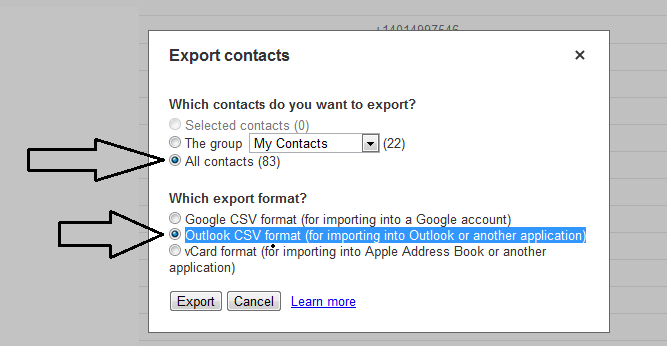
the Export Contacts window will pop up. select the checkmark for All contacts and Outlook CSV format (for importing into Outlook or another application)
image
click on the Export button. a contact .csv file is created, and downloaded to your computer.
now we are ready to import to Outlook.
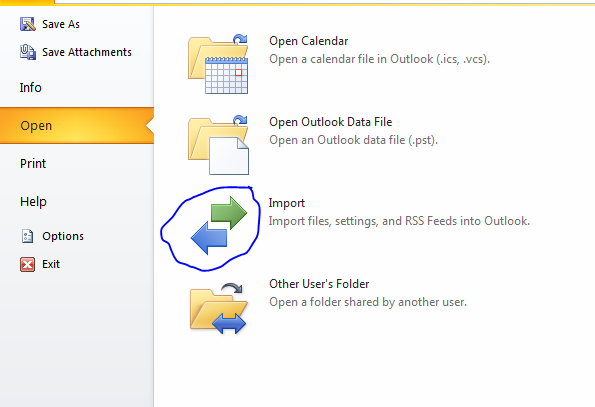
from Outlook 2010, click on file > Open. then click on the Import arrows:
image
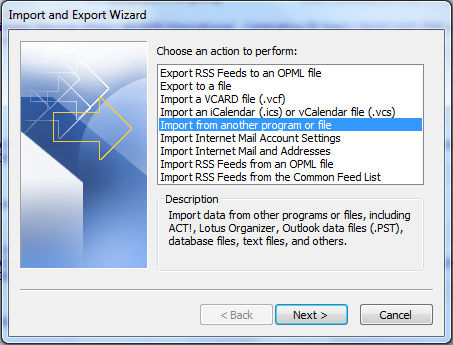
the import wizard will come up. choose import from another program or file, and click next.
image
choose Comma separated values ( DOS ) on the following screen. browse to the file you exported from Gmail, and select Do not import duplicate items
image
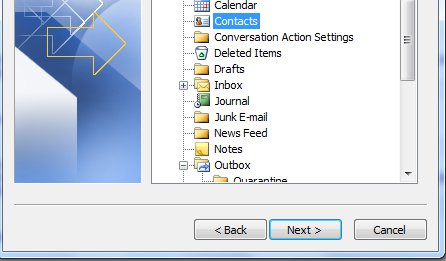
choose the contacts folder on the next screen. and click Next.
image
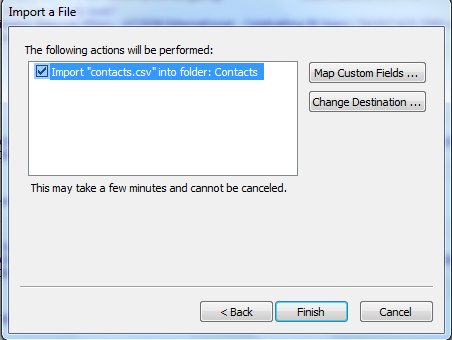
click on Finish on the final screen.
image
that’s all.. all your contacts from Gmail should be now on your Outlook.

Windows Easy Transfer From Windows 7 64-Bit To Windows 7 32-Bit OS


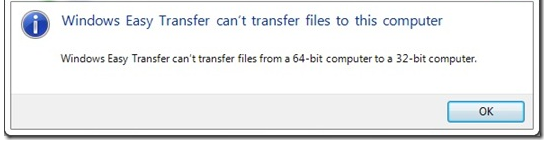
If you are reading this post is most likely because you used Windows Easy Transfer to save your files and settings from your 64-bit Windows 7 computer, and now when you try to transfer those files and settings back to a Windows 7 32-bit operating system computer you are getting this fat error:
Windows Easy Transfer can’t transfer files from a 64-bit computer to a 32-bit computer:
image
the error is correct, because of architecture differences between windows 7 64-bit and Windows 7 32-bit OS, the program only works one way, from 32-bit to 64-bit but not vise versa. I know it sucks, but I have a solution for you, not the best one, but still you can get your files back, if that’s critical for you.
you need to install either VMware Server or Virtual PC.  after you install VMware Server, or Virtual PCcreate a VM and install Windows 7 64-bit  on it. you can download Windows 7 64-bit trial for 90 days from here  after you have installed Windows 7 64-bit on the VM, run the Windows easy transfer from the VM to get the files, and then manually copy the files to your new 32-bit Windows 7 computer.
easy.
I told you it was not the best solution, but it worked for me, and it might work for you.

How To Create An ISO image


There are many occasions when you would want to create an ISO image.  for example, when you want to  create an exact copy of a disk, you create an ISO image, when you modify a bootable CD, you create an ISO image, etc. in this article I will discuss the easiest and quickest way to create an ISO image.

Most CD/DVD burning software support ISO image creation, but if you use windows XP, Vista or Windows 7, you probably already know that it supports native CD/DVD burning, so we only need to add the ISO creation capability by downloading a plugin.
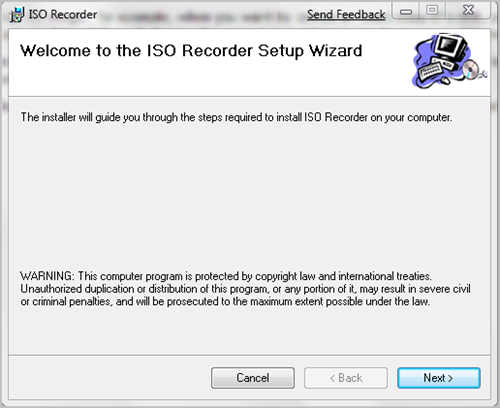
open your browser and go to ISO recorder and download the plugin (power toy) for your Windows version. click on the .MSI file to to launch the setup wizard:
ISO recorder wizard
the installation should be straightforward, just click Next on all windows.
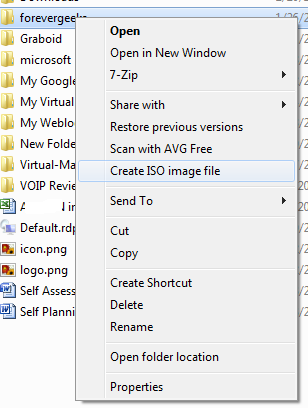
once you have installed the ISO recorder power toy, right click on any directory you want to create an ISO image of, and you will see the option to create an ISO image from the right-click menu:
Create an ISO image
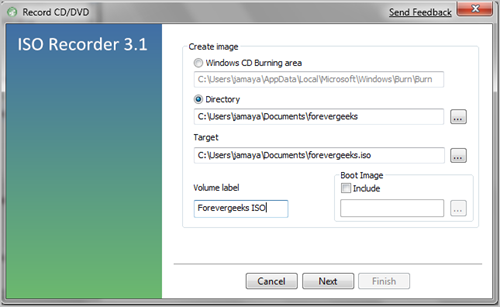
The Create ISO image window will come up:
ISO Recorder
Basically, you can just click on the Next button here, but if have time, add the Volume label name, and choose the directory rather than the default where to save the ISO image.
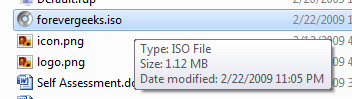
you will find that the ISO image has been created:
ISO image
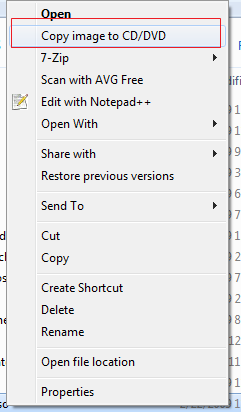
now if you right-click on this ISO image, you can easily burn it to a CD or DVD by choosing the option to Copy image to CD or DVD from the menu:
copy ISO image
from there on just insert a blank CD or DVD and click on next button to burn it.
that’s it. that’s how simple is to create an ISO image on windows XP, Vista or 7.