Thursday, September 15, 2011

Download Windows 8 ISO image


From the past few months, we have been hearing about Windows 8 builds leaking to the internet through file sharing sites, and peer-to peer networks. Most of those Windows 8 copies are corrupted, buggy, and it is illegal to download them. Thanks to the throttled broadband here- I didn’t try any unofficial Windows 8 builds as it might end up in wasting 4-5 GB of my bandwidth, and the wait seems to be worthwhile. Microsoft today uncovered the developer preview of the Windows 8 and promulgated that they will release Windows 8 ISO image as a free download for the public.

Windows 8 UI
What I felt from the Windows 8 introduction video is that the OS interface is a blend of Windows 7 and the Metro style UI that is being used in Windows phone 7. In my opinion, Windows 7 is well enough for our every day computing- its fast, easy to understand and supported by a lot of apps. So do we want another operating system with a totally new UI? Well, Microsoft says yes, and the move is not that unexpected. In view of the tablet revolution, we have seen this year, there is no other way than making a flexible multi-platform OS. Interestingly Windows 8 is conformable with non-touch PCs and even netbooks with Intel Atom processor and at least 1GB of RAM.  Does your computer meet this spec? Go ahead and download Windows 8 developer preview.
Download Windows 8

Download Windows 8 ISO image

Earlier Microsoft used to release Windows developer builds though MSDN/Technet at first, and then to be public. Thankfully, this time everyone can download Windows 8 ISO-from the official Microsoft website. What you need is to get a Windows Hotmail or Live Mail ID, and then proceed to the link given in the image. Download the 32 bit or 64 bit version of Windows 8 and use the Windows 7 disk utility to burn that ISO file to a DVD. For this time, it is heard that you have to do a fresh installation. We will share our thoughts on Windows 8, more screenshots and if possible the direct download links, in the morning.
Update: Windows 8 ISO direct link- Download 32 bit (2.8), 64 bit (3.6GB).
Unfortunately, some of Windows 8 features like app store and parts of Metro UI will not work on this dev preview.

Thursday, September 8, 2011

What is rundll32.exe And Why Is It Running?


ou are no doubt reading this article because you’ve looked in task manager and wondered what on earth all those rundll32.exe processes are, and why they are running… So what are they?
Explanation
If you’ve been around Windows for any amount of time, you’ve seen the zillions of *.dll (Dynamic Link Library) files in every application folder, which are used to store common pieces of application logic that can be accessed from multiple applications.
Since there’s no way to directly launch a DLL file, the rundll32.exe application is simply used to launch functionality stored in shared .dll files. This executable is a valid part of Windows, and normally shouldn’t be a threat.
Note: the valid process is normally located at \Windows\System32\rundll32.exe, but sometimes spyware uses the same filename and runs from a different directory in order to disguise itself. If you think you have a problem, you should always run a scan to be sure, but we can verify exactly what is going on… so keep reading.
Using Windows Vista’s Task Manager
One of the great features in Windows Vista’s Task Manager is the ability to see the full command line for any running application. For instance, you’ll see that I have two rundll32.exe processes in my list here:
image
If you go to View \ Select Columns, you’ll see the option for “Command Line” in the list, which you’ll want to check.
image
Now you can see the full path for the file in the list, which you’ll notice is the valid path for rundll32.exe in the System32 directory, and the argument is another DLL that is actually what is being run.
image
If you browse down to locate that file, which in this example is nvmctray.dll, you’ll usually see what it actually is when you hover your mouse over the filename:
image
Otherwise, you can open up the Properties and take a look at the Details to see the file description, which usually will tell you the purpose for that file.
image
Once we know what it is, we can figure out if we want to disable it or not, which we’ll cover below. If there isn’t any information at all, you should either Google it, or ask somebody on a helpful forum.
Using Process Explorer on Vista or XP
Instead of using Task Manager, we can use the freeware Process Explorer utility from Microsoft to figure out what is going on, which has the benefit of also working in Windows XP.
Simply launch Process Explorer, and if you are using Vista you’ll want to choose File \ Show Details for All Processes.
image
Now when you hover over the rundll32.exe in the list, you’ll see a tooltip with the details of what it actually is:
image
Or you can right-click, choose Properties, and then take a look at the Image tab to see the full pathname that is being launched, and you can even see the Parent process, which in this case is the Windows shell (explorer.exe), indicating that it was likely launched from a shortcut or startup item.
image
You can browse down and view the details of the file just like we did in the task manager section above. In my instance, it’s a part of the NVIDIA control panel, and so I’m not going to do anything about it.
Disabling the Process
Depending on what the process is, you won’t want to necessarily disable it, but if you would like to, you can type msconfig.exe into the start menu search or run box and you should be able to find it by the Command column, which should be the same as the “Command line” field we saw in Process Explorer. Simply uncheck the box to prevent it from starting automatically.
image
Sometimes the process doesn’t actually have a startup item, in which case you’ll likely have to do some research to figure out where it was started from. For instance, if you open up Display Properties on XP you’ll see another rundll32.exe in the list, because Windows internally uses rundll32 to run that dialog.

What is svchost.exe And Why Is It Running?


What is svchost.exe And Why Is It Running?

You are no doubt reading this article because you are wondering why on earth there are nearly a dozen processes running with the name svchost.exe. You can’t kill them, and you don’t remember starting them… so what are they?
This article is part of our series explaining various processes found in Task Manager, including: jusched.exedwm.exectfmon.exewmpnetwk.exewmpnscfg.exe,mDNSResponder.execonhost.exerundll32.exeDpupdchk.exe, and Adobe_Updater.exe.
Do you know what those services are? Better start reading!
So What Is It?
According to Microsoft: “svchost.exe is a generic host process name for services that run from dynamic-link libraries”. Could we have that in english please?
Some time ago, Microsoft started moving all of the functionality from internal Windows services into .dll files instead of .exe files. From a programming perspective this makes more sense for reusability… but the problem is that you can’t launch a .dll file directly from Windows, it has to be loaded up from a running executable (.exe). Thus the svchost.exe process was born.
Why Are There So Many svchost.exes Running?
If you’ve ever taken a look at the Services section in control panel you might notice that there are a Lot of services required by Windows. If every single service ran under a single svchost.exe instance, a failure in one might bring down all of Windows… so they are separated out.
Those services are organized into logical groups, and then a single svchost.exe instance is created for each group. For instance, one svchost.exe instance runs the 3 services related to the firewall. Another svchost.exe instance might run all the services related to the user interface, and so on.
So What Can I Do About It?
You can trim down unneeded services by disabling or stopping the services that don’t absolutely need to be running. Additionally, if you are noticing very heavy CPU usage on a single svchost.exe instance you can restart the services running under that instance.
The biggest problem is identifying what services are being run on a particular svchost.exe instance… we’ll cover that below.
If you are curious what we’re talking about, just open up Task Manager and check the “Show processes from all users” box:
image
Checking From the Command Line (Vista or XP Pro)
If you want to see what services are being hosted by a particular svchost.exe instance, you can use the tasklist command from the command prompt in order to see the list of services.
tasklist /SVC
image
The problem with using the command line method is that you don’t necessarily know what these cryptic names refer to.
Checking in Task Manager in Vista
You can right-click on a particular svchost.exe process, and then choose the “Go to Service” option.
image
This will flip over to the Services tab, where the services running under that svchost.exe process will be selected:
image
The great thing about doing it this way is that you can see the real name under the Description column, so you can choose to disable the service if you don’t want it running.
Using Process Explorer in Vista or XP
You can use the excellent Process Explorer utility from Microsoft/Sysinternals to see what services are running as a part of a svchost.exe process.
Hovering your mouse over one of the processes will show you a popup list of all the services:
image
Or you can double-click on a svchost.exe instance and select the Services tab, where you can choose to stop one of the services if you choose.
image
Disabling Services
Open up Services from the administrative tools section of Control Panel, or typeservices.msc into the start menu search or run box.
Find the service in the list that you’d like to disable, and either double-click on it or right-click and choose Properties.
image
Change the Startup Type to Disabled, and then click the Stop button to immediately stop it.
 image
You could also use the command prompt to disable the service if you choose. In this command “trkwks” is the Service name from the above dialog, but if you go back to the tasklist command at the beginning of this article you’ll notice you can find it there as well.
sc config trkwks start= disabled
Hopefully this helps somebody!

Learn How to Securely Delete Files in Windows

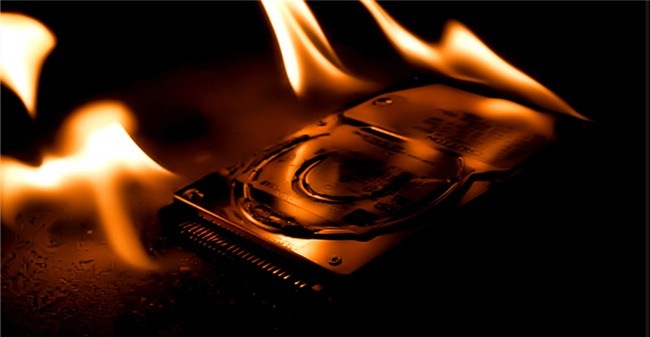
00_burning_hard_disk
When you delete a file in Windows, only the reference to the file is removed from the file system table. The file still exists on disk until other data overwrites it, leaving it vulnerable to recovery.
There are many tools available out there that allow you to securely delete files so they cannot be recovered. This article provides a summary of some of the free tools available out there, many of which are portable, allowing you to securely delete files you may temporarily save to public computers.

Eraser

Eraser makes it very easy to securely delete files, folders, or both. It overwrites the files being deleted with random data. There are several options for the number of times the files being deleted are overwritten with random data, including two versions of the US DoD 5220.22-M standard (3-pass and 7-pass) and the Gutmann method, which overwrites the file with random data 35 times.
You can immediately delete files and folders using the On-Demand interface or schedule files and folders to be securely deleted at a specific time using the Scheduler.
Eraser comes in a version you can install, which also allows you to add an option to the Windows Explorer context menu to securely erase files within Explorer. You can also download a portable version of Eraser you can take with you on a USB flash drive to delete files you save on other computers.
Download the installable version of Eraser from eraser.heidi.ie or the portable version fromPortableApps.com.
01_eraser_main_window

Freeraser

Freeraser is a free, portable tool that allows you to securely delete files using drag-and-drop. You can select to delete your files using a Fast method of filling the space with random data with one pass, using a Forced method that utilizes the DoD 5220.22M, 3-pass standard, or using the Ultimate, or Gutmann, method, deleting files by overwriting them with random data 35 times. Right-clicking on the Freeraser trash can displays a menu allowing you to manually select a file for deletion and to change the options for the program.
Download Freeraser from pendriveapps.com.
02_dragging_file_to_freeraser

Blank And Secure

Blank And Secure is another portable drag-and-drop secure file deletion tool. Simply, drag-and-drop files or folders to be deleted onto the middle box on the Blank And Secure window. You can specify how many times the files are to be overwritten by zeros by clicking the Overwrite X times button and selecting an option. The deletion operation can be delayed up to 9 seconds using the Delete Delay X sec. button.
Download Blank And Secure from pendriveapps.com.
03_blank_and_secure_main_window

DP Shredder

DP Shredder is a portable, small program that allows you to securely delete files or directories and to overwrite the free space on a hard drive so files that were deleted previously without using secure methods cannot be recovered. You can easily select the method for deletion, which includes two US DoD-approved methods and the Gutmann method, and how many times (Rounds) the method will be applied.
Download DP Shredder from portablefreeware.com.
04_dp_shredder_main_window

SDelete

SDelete is a command line tool allowing you to overwrite the free space on your hard disk so any previously deleted data becomes unrecoverable. It is portable and can be run from a USB flash drive in a command prompt window. To get help with how to use the command, type “sdelete” (without the quotes) at the command prompt and press Enter.
Download SDelete from technet.microsoft.com.
05_sdelete_commands_listing

CCleaner

CCleaner is a program that removes unused, temporary files from your system, cleans up your internet history and cookies, contains a tool for cleaning the registry, and even allows you to clean up files from applications installed on your computer. The latest version offers a tool for wiping the free space on your hard drive. You can wipe the free space on a hard drive or the entire drive, securely deleting all data on the drive. There are four options for specifying how many times the data will be overwritten.
Download the installable version or the portable version of CCleaner from piriform.com.
05_ccleaner_drive_wiper
A program for secure deletion of files is a useful addition to your software toolbox, especially if you use different computers, some of which may be public machines.

Troubleshooting "My Computer" Opening Slowly on Windows XP


If “My Computer” takes a really long time to open on your computer, you are most likely experiencing a well-known issue where Windows hangs while trying to search for network folders and printers before displaying anything to you.
This problem is easily solved, and most of you are probably familiar with the fix already, but we’ll go through it anyway.
Open up Folder Options from the Tools menu in Windows Explorer:
winexpoptions.png
Then choose the View tab:
image
Uncheck the box for “Automatically search for network folders and printers”, and close the dialog.
The changes should be immediate, and your problem should be gone.

Install IIS in windows XP without Having Windows XP CD


Yesterday night I found myself in a big problem, I had to install IIS on a remote XP machine and I had no windows XP CD or image there. I have this image in my network but I couldn’t take the remote machine on my VPN as we both the network had same local default gateway.

I searched for the same over internet and found something that I was not very much happy so I decided to go for my own way and I extracted all the required dll, ocx, exe and other files from Windows XP CD and uploaded them on Rapidshare now any one can use this file to install IIS without having CD.

I will explain both the method and you choose which one you want to go.

Simplest method
Download the Windows XP IIS required file from here extract it and give the path of this extracted folder when it ask for dll files while installing IIS in XP without having a CD.

Second method
1) Download the windows XP SP 2 patch from here .
2) Extract the downloaded exe file using the bellow command in command prompt.
C:\Downloads\Software>WindowsXP-KB835935-SP2-ENU.exe /extract d:\xpsp2
Here c:\downloads\software is the folder where this WindowsXP-KB835935-SP2-ENU.exe file is stored and d:\xpsp2 is location where all the files from this file will get extracted.
3) When extraction is done install IIS and give the path of i386 folder in d:\xpsp2\i386 folder it will take all the necessary files from this location.

Precaution: The above method will work only for windows XP 32 bit version. For 64 bit version you need to download separate sp2 file.

If you feel not safe for installing files from my zipped file you can download those 118 file from www.dlldownload.com

I hope it was useful and helped you to solve your problem.

Show hidden folder not getting enabled


how hidden folder not getting enabled using registry

Many time people complaint that they are not able to enable the show hidden folder and file option. When they go to tools-> folder options->view->hidden files and folders->show hidden files and folders 

When they enable it and click on Apply and OK it never work.

I have a simple solution for that, we need to edit one setting in registry and after that editing enable the hidden folder and files option from above location it will work fine.
Here is complete process for that.
  1. Click on start and then run (windows+r would be fine)
  2. Type regedit and press enter
  3. Go to this location in registry editor (colored in red).Computer\HKEY_LOCAL_MACHINE\SOFTWARE\Microsoft\Windows\CurrentVersion\explorer\Advanced\Folder\Hidden\SHOWALL
  4. Now double click on key CheckedValue (right side of the main menu) and it will open a window as bellow for you 
  5. In Value data give a number as 2 and click on ok
  6. Now go to windows explorer -> tools-> folder options->view->hidden files and folders->show hidden files and folders and select show hidden files and folder click on apply and OK
Now you will be able to see the hidden files and folder in your computer.

Hope it was easy and useful for you

w32/conficker!mem Trojan not able to remove from svchost.exe file.

w32/conficker!mem Trojan removal

Few of computers in my office got infected due to this virus because of some mistake of team members. I tried to remove the virus using Stinger but Stinger was not able to remove this. I used MacAfee and with latest virus update definition MacAfee was able to protect my system but it started giving me a buffer overflow protection message due to svchost.exe file in windows.

I tried to remove the virus from file using MacAfee but did not get any success for that. Neither from Kaspersky. All the time when I scan my system I was getting message of Virus attached with svchost.exe file in my system. Finally I came up with a solution as replacing svchoste.exe fie from system32 of a new healthy computer to infected computer and that worked out of box.

You will not be able to do this directly so here is a short method for that.
1) Installed a new similar operating system in virtual Machine or where you can.
2) Copy svchost.exe file from c:\windows\system32 folder to your computer.
3) Open c:\windows\system32 folder of your computer.
4) Find our svchost.exe file and rename it as svchost_old.exe.
5) Copy the new svchost.exe file in c:\windows\system32 folder.
6) Make sure to delete the entire scheduled task from C:\windows\tasks folder. Remove those task also that you created you can make them again but don’t take a chance to start this problem again in your operating system.

After doing all this make sure you update your computer with latest virus update or at least update thishttp://www.microsoft.com/downloads/details.aspx?familyid=0D5F9B6E-9265-44B9-A376-2067B73D6A03&displaylang=en

Update for your computer.

I am assuming you have fully working updated antivirus in your system before doing this. If not please go ahead and get a working antivirus for your computer. If you don’t want to buy or you don’t know from where you can get the antivirus free visitwww.raymond.cc he is a good guy who provide many software free of cost.

Hope it was useful for you and you liked it.

How to configure DHCP server in DWL-3200AP


As I already explain about basic configuration of DWL-3200AP in my previous post here ,its second part of same tutorial.
Step by step guide to enable DHCP server in DWL-3200AP
  1. Open your browser type URL of your access point. If you have any doubts visit my previous post.
  2. Click advance setting, DHCP server, and Dynamic pool setting.
  3. For DHCP server control select enable in front of Function Enable/Disable. 
  4. Assign a range of free IP in your network to this dynamic pool setting.
  5. IP Assigned from:à in this field give an IP from where your wireless devices will start getting IP.
  6. The Range of pool. In this range of pool you have to give last IP address that wireless device should get from DHCP.
  7. Submask, its subnet mask of your network.
  8. Default gateway, WINS and DNS should be same as you give manually on all other computer manually.
  9. Lease time, you can give any amount in this I would recommend 6000.
  10. Make the status ON and click on Apply.
  11. Now click on system and restart. In 30 second it will reboot and now you can connect with your access point wirelessly using DHCP setting on client computer.
Things need to remember while doing this setting.
  1. IP range that you give for DHCP should be free and you must not assign this IP to anyone else it might create IP conflict problem and it will make your entire network unstable.
  2. You cannot create another network using this access point.
  3. You can just expand your network this router cannot work as access point.
  4. For maximum utilization keep your access point at a place from where you can receive signal at every corner.
  5. For maximum benefit of the access point check if you can avoid walls and windows for better signals.
Hope it was helpful for you and it solved your problem.
If you find any problem in this or if some thing is not clear for you, you can visit my previous post here for basic and easy configuration of DWL-3200AP.

D-Link DWL-3200AP 802.11G INDOOR WIRELESS ACCESS POINT + POE Easy Configuration Guide

Here is complete step by step guide for configuring DWL-3200AP
  1. Connect your access point in your network as guided by “D-link installation guide”.
  2. Default IP of Access point is 192.168.0.50 so you need to make sure your computer IP is in range.
  3. If your computer IP is in same range no need to do any change else give it your computer IP as 192.168.0.10 or any other in this range.
  4. You are done at preparation part now open your browser and type http://192.168.0.50/ and press enter.
  5. It should ask for user name and password. Give username “admin” and password is blank.
  6. Now it will open a page similar to this. 
  7. Click on basic settings and click on LAN. 
  8. In IP address text box give a new free IP that is in your network range.
  9. Give subnet mast and default gateway and click on apply.
  10. Now click on system and click on apply setting and restart button
  11. It’s necessary to restart it for making any new change else it won’t work properly.
  12. It will take 30 second to reboot.
  13. Connect access point with new settings. It will ask for user name and password and it will open same screen.
  14. Now click on basic settings and wireless.
  15. In this screen you will get many drops down boxes for configuring settings.
  16. I am guiding you for access point mode only at present I am not writing for any other mode.
  17. For making an access point select mode as Access point.
  18. Give a name to Wireless network Name (SSID).
  19. Enable SSID broadcast.
  20. Select a channel or let it be auto select.
  21. If you want your network to be secure in authentication select “WPA-Personal”.
  22. Cipher type “Auto” and Group Key Update Interval time “1800”.
  23. Give a passphrase in passphrase text box.
  24. Click on Apply and click system and click on Restart.
If you have DHCP server/router in your network or if you want to give IP address manually on all of wireless device you are done with settings and you don’t need to make any changes. You can connect with your newly created wireless network now.

If you don’t have DHCP server in your network and you wish to give IP address automatically on all of the wireless network device Please keep reading on how to enable dhcp on DWL-3200AP.

For any advance setting in this access point I will write another tutorial guide very soon.

Hope it was helpful for you and it solved your problems

Thanks for being here.


Rayudu

Wednesday, September 7, 2011

Top 10 Things To Remember Before Installing Windows 7


I hope most of the Windows lovers have downloaded the BETA copy of Windows 7 and roaring to install it. Don’t start your install procedure without reading this guide as you may lose many important files and settings.


In this guide I will point out some important things that you need to do and remember before installing Windows 7 on your machine.
vista to windows7
1.Check the hardware requirement: This is one of the most important factors that you need to keep in mind before thinking about Windows 7.Though Windows 7 should run fine with the 512 MB RAM system, it’s always better to follow Microsoft recommendations. Below are the Windows 7 requirements:
*A blank DVD
*A PC with a DVD burner
*A test PC for the Windows 7 Beta that meets these minimum hardware recommendations (specific to the Beta and subject to change in the final version of Windows 7). Please do not use a PC you rely on for your work or daily use:
*1 GHz 32-bit or 64-bit processor
*1 GB of system memory
*16 GB of available disk space
*Support for DirectX 9 graphics with 128 MB memory (in order to enable Aero theme)
*DVD-R/W Drive
*Internet access (to download the Beta and get updates)

2. Backup Vista: If you are planning to upgrade from Vista SP1(SP1 is must) then it’s a good idea to backup your Vista drive so that you can revert back to Vista easily. I hope most of you know how to do back up task!


3. You need to backup all your profiles and other important files that I have listed below. In case you are planning to wipe out Vista and install Windows 7 then also it’s better to create a backup of all profiles. Below are the important profiles that I backup:
Backup
*Documents
*Outlook pst file
*Windows live writer folder
*Saved games
*Other program profiles that you use.

4. The most important thing for a web addict is browser bookmark folder. Use backup Bookmarks option in your browser to create a bookmark. Download Password Exporter add-on for Firefox to backup all your saved passwords. Also don’t forgot jot down all installed add-ons!
Internet
You can even use Mozilla Restorator to backup full Firefox profile.

5. If you have installed too many programs then it’s a good idea to generate list of installed application using a simple command that I have explained in the Generate list of installed applications guide.

6. Next obvious task is to backup all the custom settings that you have done to your Vista. Of course, you can back up! Type Windows Easy Transfer in Start Menu search box and hit enter to open. Follow the simple instructions to complete the task.
Documents
Windows Easy Transfer helps you move your many files, folders, and program settings from one computer to another—all in one process.
Using Windows Easy Transfer, you can choose to move:
#User accounts
#Documents
#Music
#Pictures
#E–mail
#Internet favorites
#Program settings

7. Move your Download folder from the “C” drive to any other safe location so that you will not lose the downloaded files.

8. Though Microsoft recommends 16GB drive to install Windows 7 I recommend at least 30GB so that you won’t run out of free space in near feature.

9. If you have any files in Desktop just move to safe place since most of us keep important files on Desktop for quick access.
Key
10. Last but least, don’t forget to retrieve Office and other product keys using free programs like Winkey Finder.