After installing VMware Server in our previous post is time to setup our first virtual machine. Read our previous articles on the links below.
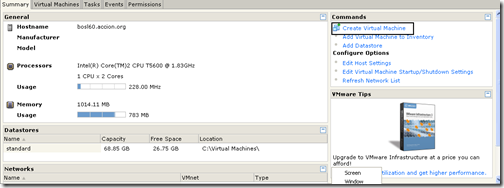
Once you have logged in to VMware Infrastructure Web Access administrator panel, click on Create Virtual Machine” on the command section:
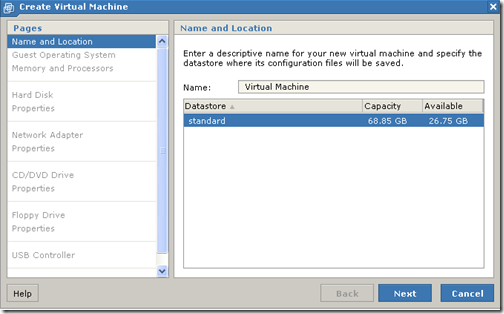
The Create Virtual Machine wizard should come up.
Make sure to name your virtual machine with something descriptive. click on Next.
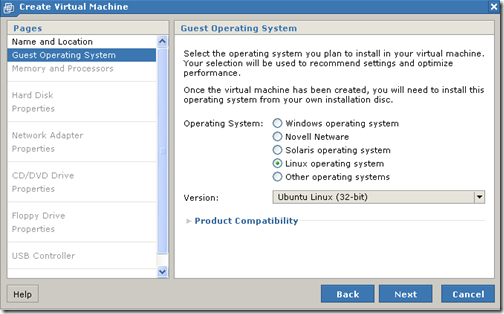
Next, select the guest Operating System. in my case that would be Ubuntu Linux (32-bits):
Click on Next after you have chosen your guest operating system.
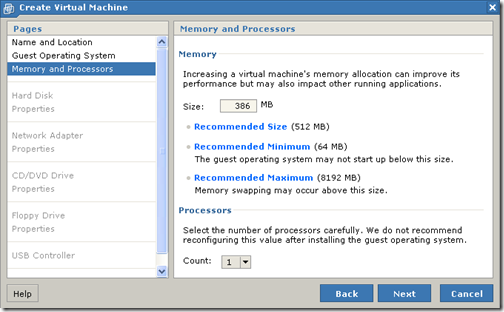
on the following screen, choose the amount of memory you want to use for this virtual machine. the recommended amount of memory for Ubuntu is 512 MB, but I only have a 1 GB of memory on this machine, so I will set only 384 MB of memory for this virtual machine. for processors count, leave the default setting:
Click Next after you have chosen the settings for your virtual machine.
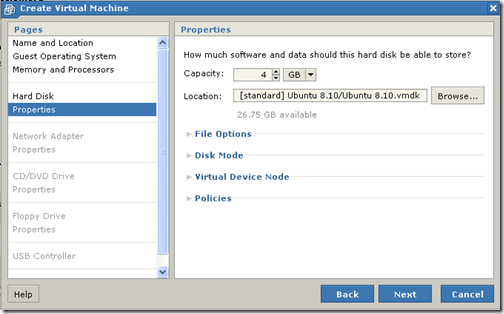
Next, you will need to create the virtual disk for your virtual machine. click on Create a New Virtual Diskthen after the disk property comes up, type the amount of the physical disk you want to use for this virtual machine. I’ll choose to allocate 4GB for Ubuntu on this virtual machine:
click on Next after you have entered your settings. leave the rest as default.
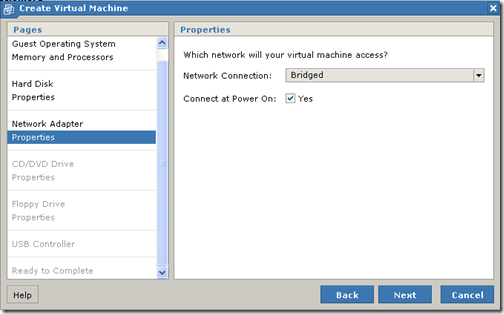
Next, you will need to specified your network adapter. click on Add A Network Adapter . the default network connection should be Bridged and Connect at Power On should be checked:
click on the Next button after setting your preferences.
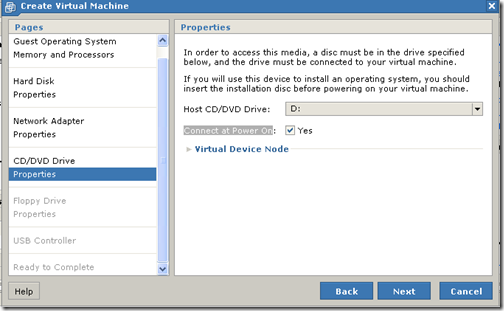
on the following screen as the screen above, you will need to choose the physical CD/DVD ROM drive you want use on the virtual machine. click on Use a Physical Drive on the Host CD/DVD Drive your physical computer CD-ROM drive should be selected. also make sure Connect at Power On should be checked:
Next, choose if you whether want to use a floppy drive or not on your virtual machine. I never use floppy drives, and my computer does not have one, so I won’t choose any. if you are using an old computer that still has a floppy drive, go ahead and add it, if not, just choose Don’t Add a Floppy Drive.
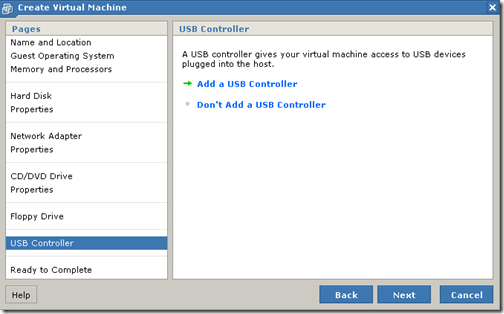
On the following window, you will need to add the USB controller. click on Add a USB Controller:
That should add the physical USB controller to the virtual machine.
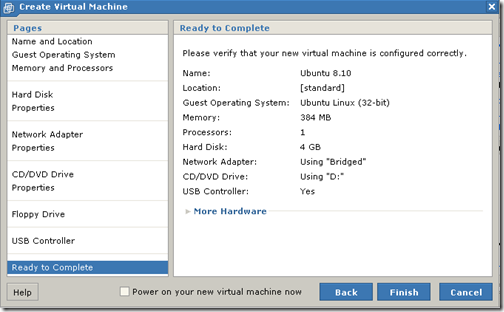
next, you should get the Ready To Complete window:
click on Finish to create the virtual machine.
the newly created virtual machine should appear on the Inventory panel on the left-hand side. it should be ready to be powered up.
No comments:
Post a Comment